

How to build a simple personal VPN server on AWS
Creating a simple VPN server on AWS can help us solve some small everyday problems: for example, it helped me when I made the revolutionary decision to replace my home ADSL with a more powerful LTE 4G connectivity. Living in an area not yet reached (and who knows when it will happen) by fiber, I decided to take advantage of one of the “many GB included” offers, far exceeding the performance of the traditional land line and saving even a little every month.
As we know, mobile connectivity is almost always behind NAT. The public IP address is actually shared between multiple devices and users. By itself this type of connectivity is not a limit to access web services but, it makes impossible to contact your 4G device from another device on the public network. So how can I connect, wherever I am, to the devices in my home LAN if they are behind mobile connectivity?
For this reason and for others that we will see, it can be convenient to create a simple VPN network.
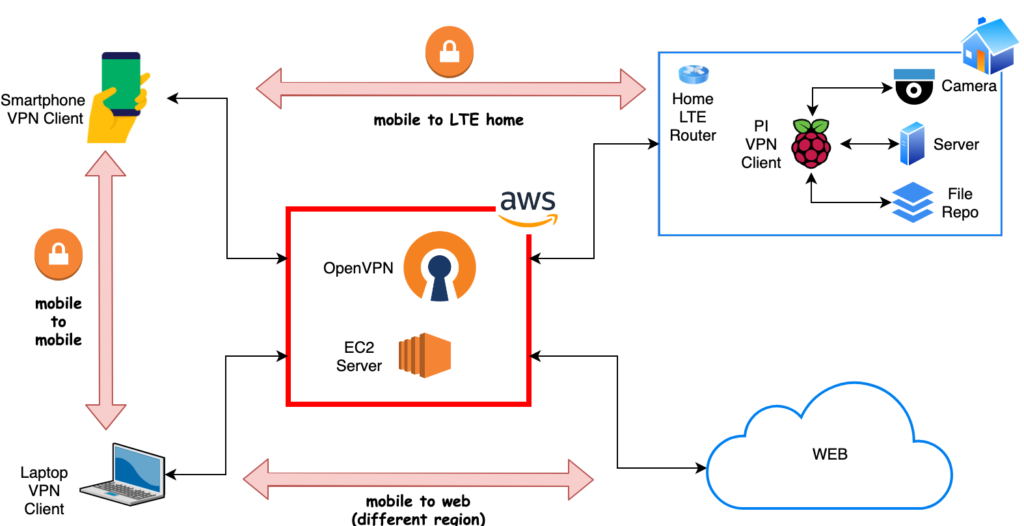
The heart of a VPN is a central server, reachable by all the clients that will be authenticated by the same. Once connected, the devices placed on the VPN will be able to communicate securely with each other, overcoming the limitations of the underlying network levels, as if they were on a single – virtual and private – LAN.
Let’s see how to make a simple VPN server on AWS using OpenVPN. The diagram that we will follow is the following.
We build the server
We need an EC2 instance: we use an On-Demand instance to be fast. We will take care of installing and configuring all the necessary software; then we will go ahead and create our own AMI so that we can quickly recreate our server.
We start our EC2 based on Ubuntu Server 18.04 LTS: it will be very easy to configure our OpenVPN server without having to use MarketPlace AMI.
An instance t2.micro Free-Tier is absolutely suitable for the purpose; we configure a Security Group so that it can be reached via the SSH protocol (TCP / 22).
Once started, connect to the console using the user ubuntu.
ssh -i <keypairfile.pem> ubuntu@<ec2_public_ip>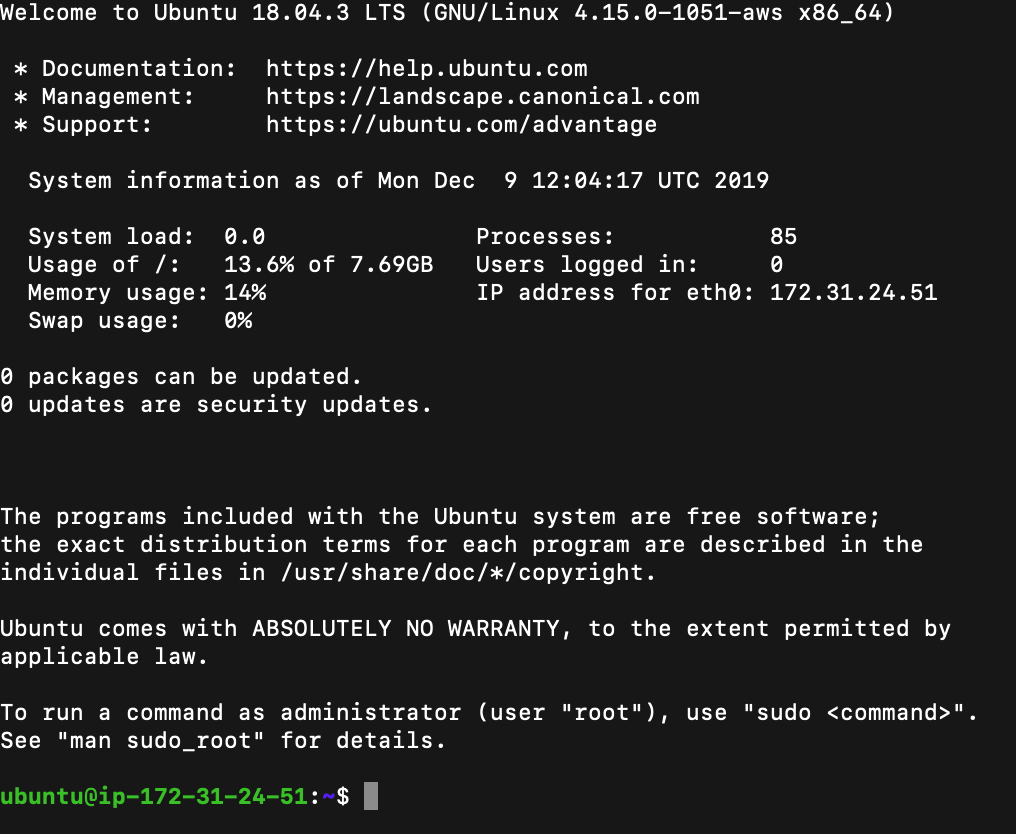
We update our instance immediately and retrieve the OpenVPN installation script
sudo apt-get update
sudo apt-get upgrade -y
wget https://git.io/vpn -O openvpn-install.sh
chmod +x openvpn-install.sh
At this point, before launching the installation script it is necessary to make a choice: to contact our OpenVPN server we need to provide its address to the clients. The address can be a static IP or a DNS hostname record. The simplest solution is to assign an Elastic IP to our instance. However, I preferred to make our configuration independent of the IP address assigned to the server, using AWS Route 53 to define a public hostname to which our clients will refer.
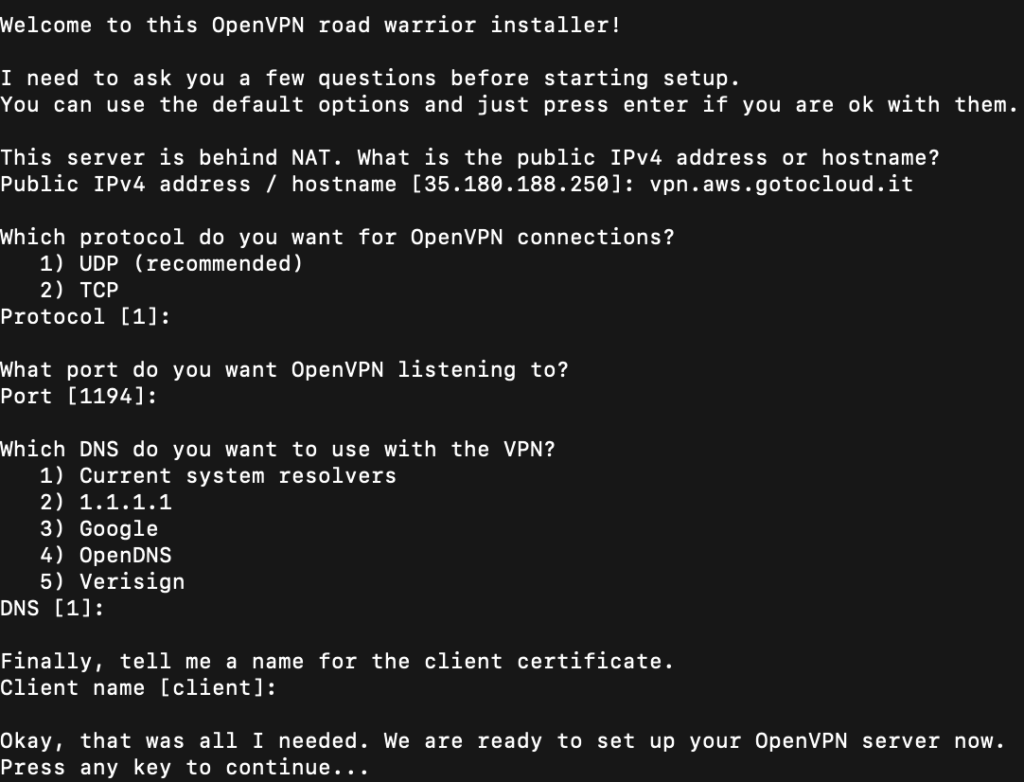
Let’s run the script
sudo ./openvpn-install.shThe first thing we will be asked is the OpenVPN server address, which the script tries to automatically determine. If we have assigned an Elastic IP to our AWS instance, we confirm the address. If we intend to use a host in a Route 53 zone, we specify the complete host name. In my case: vpn.aws.gotocloud.it.
We confirm all subsequent requests with the proposed default values and start the installation.
At the end of the installation a message reminds us that the configuration file and the certificate to be used on one of our clients (laptop, smartphone, raspberry, etc.) is available in /home/ubuntu/client.ovpn
Let’s make sure we start OpenVPN.
sudo systemctl enable openvpn
sudo systemctl start openvpn
Some information: the script creates the network 10.8.0.0/24 and assigns the ip address 10.8.0.1 to our OpenVPN server. Subsequent IP addresses will be assigned to clients. We will use this address to communicate via our VPN.
OpenVPN uses UDP port 1194 by default. We must therefore modify the SecurityGroup of the EC2 application we are working on by adding this policy.

If we decided to use an Elastic IP address, the server configuration is finished. If instead we have decided to use a host name of a DNS zone hosted on Route 53, we will have to make sure to update the related A record with the public address that AWS has assigned to our instance, repeating the operation at each start. To do this we use a Python script.
Route53 integration
First we install the dependencies including Boto3 which is the AWS SDK for Python. Since the script will be run as root at startup, its dependencies must also be installed in the root environment.
sudo apt install python-pip -y
sudo su
pip install boto3
pip install requests
exit
Now let’s create the “update_route53_zone.py” script with the following content.
import requests
import json
import boto3

META_DATA_URL = 'http://169.254.169.254/latest/meta-data/public-ipv4'

# Route53 host to be updated
zone_name = "aws.gotocloud.it."
A_record_name = "vpn"

# Get Public IP Address
r = requests.get(META_DATA_URL)
public_ip = r.text

# Prepare data for Route53 changes
data = {}
data['Comment'] = "Update openvpn DNS record"
data['Changes'] = []
data['Changes'].append({
    'Action': 'UPSERT',
    'ResourceRecordSet': {
        "Name": A_record_name + '.' + zone_name,
        "Type": "A",
        "TTL": 60,
        "ResourceRecords": [
          {
            "Value": public_ip
          }
        ]
      }
})

# Get hosted zone list to find zone_id
client = boto3.client('route53')
zones = client.list_hosted_zones()
zone_id = ''
for z in zones['HostedZones']:
	if (z['Name'] == zone_name):
		zone_id = z['Id']
		break

# Change Route53 record
if zone_id != '':
	response = client.change_resource_record_sets(HostedZoneId=zone_id, ChangeBatch=data)
	print(response)
The script obtains the public IP address of the instance and updates the specified DNS zone by entering or updating the host indicated as “A_record_name”. To be able to update the DNS zone, the role must be assigned a role with the correct policies.
The Route 53 APIs used are “ChangeResourceRecordSets” and “ListHostedZones”.
{
    "Version": "2012-10-17",
    "Statement": [
        {
            "Sid": "VisualEditor0",
            "Effect": "Allow",
            "Action": "route53:ChangeResourceRecordSets",
            "Resource": "arn:aws:route53:::hostedzone/*"
        },
        {
            "Sid": "VisualEditor1",
            "Effect": "Allow",
            "Action": "route53:ListHostedZones",
            "Resource": "*"
        }
    ]
}
Once the role is assigned, running the script as root, the DNS record will be created or updated. To make this happen at every start, we use CRON.
sudo cp update_route53_zone.py /bin
sudo crontab -e
Adding:
@reboot python /bin/update_route53_zone.py &Client side
To add users / devices to our VPN we still use the openvpn-install.sh script. It is recommended to create a user for each device we are going to connect to our VPN by specifying a name that allows us to easily recognize it. Furthermore the script can be used to revoke a user.
It’s the client’s time: in the Community Download section of OpenVPN we find clients for various versions of Windows. On MacOS I recommend using TunnelBlick. IOS and Android provide the official OpenVPN app in their respective stores. To configure Raspbian (Raspberry PI) I instead followed the instructions in this thread.
Regardless of the client used, we need the OVPN file generated by the configuration script that we transfer from the server (i.e. using SFTP). Normally the client configuration is quite simple: with MacOS and TunnelBlick, for example, just double-click on the OVPN file for this to be imported. It will only remain to start the VPN.
If all went well, from our VPN device it will be possible to successfully ping the address of our VPN server 10.8.0.1.
Raspberry PI
For the home setup I instead chose to install the OpenVPN client on a Raspberry PI device to be used also as a bridge to other devices on my LAN. Installation on Raspbian is simple.
sudo apt-get install openvpnWe are going to copy the OVPN file to the correct directory, changing the extension to .CONF. We will then proceed to start the service.
sudo cp pi4.ovpn /etc/openvpn/pi4.conf
sudo systemctl enable openvpn
sudo systemctl start openvpn
Our PI is now connected to the VPN and we can verify it by pinging, even in this case, the IP address 10.8.0.1 of the server. On the contrary, if the IP hosts for example a repository for our files (Owncloud), this will be reachable from all devices connected in VPN (to example our smartphone) via the IP address assigned to the IP on the 10.8.0.0/24 network
If we also want the PI to act as a VPN gateway, by publishing services hosted on our LAN by other devices (for example, the IP module of our home alarm unit) we will be able to use a reverse proxy such as NGINX. Configuration example: all requests received by our PI on port 10000 are turned over to the LAN address of our home alarm unit, making it actually accessible via VPN from any device connected to it.
stream {
    upstream paradox {
        server 192.168.22.3:10000;
    }

    server {
             listen 10000;
             proxy_pass paradox;
    }
}
VPN Internet gateway
If you have kept the default configuration as indicated in this article, you have realized that, once the VPN is started by our client (for example from our laptop), this is also used for WEB browsing: in practice our EC2 server acts as our personal gateway to go on the public network. As a result we present ourselves on the internet with the IP address of the OpenVPN server in the AWS Region where it was created. We can choose in which part of the world to pretend to be, which is one of the prerogatives of paid VPN services!
If instead we want to avoid this behavior and we intend to use our VPN to reach the devices connected to it only, we will have to modify the configuration of OpenVPN.
Let’s edit the /etc/openvpn/server/server.conf file and comment on these directives.
#push "redirect-gateway def1 bypass-dhcp"
#push "dhcp-option DNS 1.1.1.1"
#push "dhcp-option DNS 1.0.0.1"
Now we restart the VPN server and our web traffic will no longer be channeled via VPN.
Conclusions
There are many alternatives to the proposed solution to solve reachability problems behind NAT, secure connection of multiple devices over internet and navigation from a different region. However, the OpenVPN / AWS solution has several advantages. Let’s see them.
- OpenVPN is free and there are clients for all major operating systems
- Using AWS you can quickly create your own OpenVPN server in different regions of the world (US / EU / etc ..) using CloudFormation.
- The configuration is simple and customizable according to your needs
- It costs less than other VPN services: we will pay for the EC2 instance only (on-demand, reserved or even Spot if we can tolerate service interruptions)
- It has no usage limits
- It is personal and self-managed: no log or data provided to a VPN provider
- It is possible to use it as bastion host to connect to our AWS resources
Did we have fun? See you next time!
1 Comment
Leave a Comment
You must be logged in to post a comment.
Well done to the author. A awesome post.